Showing posts sorted by relevance for query linux. Sort by date Show all posts

Oct 27, 2013

Top 7 Best Linux Distributions 2013

Back in 2010 Linux.com published a list of the year's top Linux distributions, and the popularity of the topic made it an instant annual tradition.

There have been several shifts and shakeups on the lists presented since then, of course, and – as you'll soon see – this year's offering holds true to that pattern. In fact, I think it's safe to say that the past year has seen so much upheaval in the desktop world – particularly where desktop environments are concerned – that 2013's list could come as a surprise to some.

Let me hasten to note that the evaluations made here are nothing if not subjective. There also is no such thing as the “one best” Linux distro for anything; in fact, much of the beauty of Linux is its diversity and the fact that it can be tweaked and customized for virtually any taste or purpose. The one best Linux for you, in other words, is the flavor you choose for your purpose and preference and then tweak until it feels just right.

Still, I think some Linux flavors stand out these days as leaders for particular use cases. I'm going to diverge a bit from past lists here when it comes to those categories, however. Specifically, where past lists have included the category “Best Linux LiveCD,” I think that's become almost obsolete given not just the general shift to USBs -- some PCs don't even come with CD drives anymore, in fact -- but also the fact that most any Linux distro can be formatted into bootable form.

On the other hand, with the arrival of Steam for Linux, I think this year has brought the need for a new category: Best Linux for Gaming.

Read on, then, for a rundown of some of the best of what the Linux world has to offer.

Best Desktop Distribution

There are so many excellent contenders for desktop Linux this year that it's become a more difficult choice than ever – and that's really saying something.

Canonical's Ubuntu has made great strides in advancing Linux's visibility in the public eye, of course, while Linux Mint and Fedora are both also very strong choices. Regarding Ubuntu, however, a number of issues have come up over the past year or so, including the inclusion of online shopping results in searches – an addition Richard Stallman and the EFF have called “spyware.”

At the same time, the upheaval caused by the introduction of mobile-inspired desktops such as Unity and GNOME 3 continues unabated, spurring the launch of more classically minded new desktops such as MATE and Cinnamon along with brand-new distros.

For best desktop Linux distro, I have to go with Fuduntu, one of this new breed of up-and-comers. Originally based on Fedora but later forked, Fuduntu offers a classic GNOME 2 interface – developed for the desktop, not for mobile devices -- and generally seems to get everything right.

Besides delivering the classic desktop so many Linux users have made clear that they prefer, Fuduntu enjoys all the advantages of being a rolling release distribution, and its repository includes key packages such as Netflix and Steam. I've been using it for months now and haven't seen a single reason to switch.

Best Laptop Distribution

At the risk of sounding repetitive, I have to go with Fuduntu for best Linux distro as well. In fact, the distro is optimized for mobile computing on laptops and netbooks, including tools to help achieve maximum battery life when untethered. Users can see battery life improvements of 30 percent or more over other Linux distributions, the distro's developers say.

Such optimizations combined with this solid and classic distro make for a winner on portable devices as well.

Best Enterprise Desktop Linux

The enterprise is one context in which I have to agree with recent years' evaluations, and that includes the enterprise desktop.

While SUSE Linux Enterprise Desktop is surely RHEL's primary competitor, I think Red Hat Enterprise Linux is the clear leader in this area, with just the right combination of security, interoperability, productivity applications and management features.

Best Enterprise Server Linux

It's a similar situation on the server. While there's no denying SUSE Linux Enterprise Server has its advantages, Red Hat is pushing ahead in exciting new ways. Particularly notable about Red Hat this year, for example, is its new focus on Big Data and the hybrid cloud, bringing a fresh new world of possibilities to its customers.

Best Security-Enhanced Distribution

Security, of course, is one of the areas in which Linux really stands out from its proprietary competitors, due not just to the nature of Linux itself but also to the availability of several security-focused Linux distributions.

Lightweight Portable Security is one relatively new contender that emerged back in 2011, and BackBox is another popular Ubuntu-based contender, but I still have to give my vote to BackTrack Linux, the heavyweight in this area whose penetration testing framework is used by the security community all over the world. Others surely have their advantages, but BackTrack is still the one to beat.


Best Multimedia Distribution

Ubuntu Studio has often been named the best distro for multimedia purposes in Linux.com's lists, but it's by no means the only contender. ZevenOS, for instance, is an interesting BeOS-flavored contender that came out with a major update last year.

For sheer power and nimble performance, though, this year's nod goes to Arch Linux. With an active community and thousands of software packages available in its repositories, Arch stays out of the way so your PC can focus on the CPU-intensive tasks at hand.

Best Gaming Distribution

Last but certainly not least is the gaming category, which surely represents one of the biggest developments in the Linux world over this past year. While it may not be relevant for enterprise audiences, gaming has long been held up as a key reason many users have stayed with Windows, so Valve's decision to bring its Steam gaming platform to Linux is nothing if not significant.

The Linux distro choice here? That would have to be Ubuntu, which is specifically promoted by the Valve team itself. “Best experienced on Ubuntu” reads the tag line that accompanied the Steam for Linux release last month, in fact. Bottom line: If you're into gaming, Ubuntu Linux is the way to go.

SteamOS could really help desktop Linux adoption, says Torvalds

The Linux desktop revolution is just around the corner!

This is a familiar refrain that has received new life in recent months thanks to Valve and its efforts to turn Linux into a gaming platform with the Steam client for Linux (shown above) and the Linux-based SteamOS.


Even Lars Gustavsson, the chief game maker for DICE, which is the EA-owned studio responsible for the Battlefield series, has a strong interest in Linux for games.

There’s so much Linux love in the air that it prompted Linus Torvalds, overlord of the Linux Kernel, to tentatively suggest that Valve’s announcements could encourage Linux adoption on desktop PCs. Screech! Not again, I hear you say?

Yes, we’ve heard the claim for years that the Linux (or GNU/Linux depending on your persuasion) desktop revolution is just around the corner. And yes, this could be just another high hope in a long history of high hopes, but Torvalds reinforced some important arguments about a Steam-powered rise for Linux.

“I think [the Steam announcements are] an opportunity to maybe really help the desktop,” Torvalds said recently during LinuxCon + CloudOpen Europe in Edinburgh, Scotland. That’s not exactly a ringing endorsement for a Linux revolution but, if anyone is familiar with endless promises of Linux-based desktops becoming popular, it’s Torvalds.

For Torvalds, Valve’s Steam efforts could be a big opportunity to drive desktop Linux because it could force the various desktop Linux distributions to standardize their technology. Torvalds said earlier in the 44-minute talk (shown below) that the Linux desktop was a “morass of infighting.” (The Steam talk starts around 29:50 minutes for those who want to fast foward.)


Critics’ reasoning

A criticism often leveled at Linux OS distributions—and contributing projects such as the Gnome desktop—is that each component insists on doing things its way, or going in a different direction, or breaking compatibility. This can result in fights over everything from the best bootloader to which desktop UI is superior (ridiculous since everybody knows Unity rocks).

Some critics, such as Gnome project founder Miguel de Icaza, put at least some of the blame at the feet of Torvalds. Regardless of who’s at fault, most critics agree that the Linux desktop is a house divided right now, which is why a company like Valve and the success of Steam is so sorely needed.

“[Valve] is this one company who has this vision for how to do things,” Torvalds said. “I think it also forces the different distributions to realize ‘hey, if this is the way Steam is going, we need to the same thing. Because we want people to be able to play games on our platform too.’”

Having everyone toe the line for popular products such as Steam for Linux is an excellent way to set technology standards, Torvalds argues. “Good standards are people doing things,” Torvalds said. “And saying ‘this is how we do it’ and being successful enough to drive the market.”

Change in the air?

Already, Valve’s appears to be influencing how major hardware vendors approach Linux. Shortly after SteamOS was announced, both AMD and Nvidia announced improved driver support for Linux. And AMD’s low-level Mantle support could result in more top-tier games landing on Linux.

But technology is only half the battle. As DICE’s Gustavsson said, it will also take that one killer app to really push Linux as a PC platform. That one game that everyone must play, but the only way to play it will be on a Linux distribution.

Will that game come from Valve in the coming months? An early look at Half-Life 3 perhaps? Only time will tell. But hey, if you’re waiting for the Linux desktop revolution to happen you’ve got nothing but time.

[via PCPro]

Nov 15, 2013

Linux Lite Is Heavy on Features and Usability

In a computing world distracted by distro overload, Linux Lite is a lightweight Linux OS that has no trouble handling a heavy workload.


Long gone are the days when it took hours to install and set up Linux on a computer, but most Linux distros still need a bit of configuration to adjust the massive desktop options to your liking.

Not so with Linux Lite. It is one of the few out-of-the-box experiences I have had in testing Linux distros that let me actually be up and working in under five minutes.

That is not to say I haven't spent time installing various preferred packages. That's the great beauty of using Linux. It gives users so much freedom to individualize the look and feel and choice of applications.

To its credit, Linux Lite does not install excessive numbers of programs to clutter up menus and home directories. Instead, it installs a collection of work and play packages to get you working and surfing. Rather than spend time removing or tolerating unwanted programs, users can simply add their preferred tools.

Testing That Testimony

My routine in checking out any unfamiliar Linux distro is to see how quickly the live session boots on my standard equipment. Usually, the first sign of duress is the lack of a wireless connection. The next stumbling block is usually one or more snags while installing the new distro to the test computers.

Linux Lite impressed me from the start. It loaded a live session in under 30 seconds with a prompt to enter my wireless connection credentials. I liked its speedy responsiveness when loading files from the DVD. I liked its fresh look and uncluttered design.

Linux Lite won me over when it installed on even my balkiest test computers without a single sign of trouble. That satisfaction continued as I performed my next critical step. Using nothing more than the installed set of packages, I attempt to use the distro to do actual work tasks for as long into my work day as I can tolerate.

I was pleasantly pleased not to have to make any settings changes or packages additions except one minor matter. Linux Lite defaults to two virtual workspaces. It only took a right click to change that setting to my standard four. The new setting was immediately activated in the workplace switcher app on the dock.

Look and Feel

Linux Lite uses the Xfce desktop environment. Not having any other choices is sometimes a good thing: It removes any quandaries about which optional offering would be better. Of course, if you prefer more memory-intensive flash-bang desktop effects, Xfce may not suit your comfort zone.

Xfce is fast and lightweight, but it is also very simple to use without compromising on performance. The Linux Lite developers did not make the mistake so many others make by embellishing or altering the integration of the desktop environment to make it more distro-unique.

I was able to easily change the default two-tone gray background with a right click on the desktop to select the Desktop Properties menu. Linux Lite offers a nice collection of colorful background images as part of the live session functionality. Often this personalizing option is not available with other Linux distros until you make a hard drive installation.

Working Desktop

The desktop screen is neat and simple, with easy navigation to the menu, system settings and configuration options. As I already mentioned, though, Linux Lite really needs no finessing to be truly usable from the start.

The menu is fairly standard yet simple and intuitive. For example, the folders are organized according to their categories. The slide-out menus are also well-categorized.

You can use the Run Program search box at the top of the menu to run a program rather than scroll through the standard menu -- but that only works if you actually know the name of what you want.

Another option is to use the Application Finder in the Accessory menu. Just select a category in the left column and click on the desired installed application in the right column.

Everything Just Works

Linux Lite has a lot going for it to make a very good first impression. With Linux Lite the basics work out-of-the-box.

For example, the only included browser is Firefox. I would have preferred the Chromium Browser, but Firefox was a reliable browser for me to start my work day rather than take time to install Chromium. Even Firefox's preinstalled state allowed me to play my online music collections and view YouTube videos without having to track down missing players and plug-ins.

When I needed to take that extra step to use some added third-party programs, relief was just a menu item away. The restricted extras package in the main system menu includes proprietary libraries and applications that enable the use of TrueType Fonts, Java, Flash and the ability to playback MP3s.

Strong System Support

Especially useful for configuring Linux Lite your way is the menu item to easily install special packages. The list includes a file and folder search tool and instant messaging. It also lets you add remote desktop, restricted extras, torrent software, video editing, VirtualBox, a weather monitor and/or Wine.

Linux Lite lacks its own community repository. The full range of package installation and software removal is done with the Synaptic Package Manager. A separate application in the main menu lets you install system updates.

The latest version of Linux Lite is "Amethyst," or version 1.0.6, released in June. The distro is based on Ubuntu 12.04 LTS, which includes five years of system updates without worrying about having to upgrade.

If you are not a fan of Ubuntu Linux, do not let the family lineage deter you from trying Linux Lite. Other than the system underpinnings, you will not see any trappings from the Ubuntu desktop.

Bottom Line

Linux Lite is an ideal starter distro for those looking for an upgrade when Windows XP dies early next year. Yet this distro is not just an easy Linux intro for newcomers -- it is a suitable workhorse distro for seasoned Linux users as well.

Even without installing it to a hard drive, you can reliably use Linux Lite in a live session from the DVD or USB drive installation. The USB option does not let you save your settings and software changes, however -- it is not intended for true portable use with persistent memory. However, if you use it only in live session mode, you can save your personal files externally.

Linux Lite is fully featured with the preinstalled software to be usable right out of the box.
Want to Suggest a Linux Application for Review?

Is there a Linux software application you'd like to suggest for review? Something you love or would like to get to know? - source

Jan 18, 2015

Reviving My Old PC with 3 Best Linux Operating Systems

Windows 8 may be lighter than Windows 7 yet lightest than Vista, but it’s nowhere near as lightweight as these free Linux distributions. If you have an old Windows XP PC or a netbook, you can revive it with a lightweight Linux system.

All of these Linux distributions can run from a live USB drive, so you could even boot them directly from a USB drive. This may be faster than installing them to the computer’s slow, aging hard drive.

Puppy Linux

Puppy Linux is designed to be extremely lightweight. When installed to a USB flash drive, it consumes only 100 MB of space — 256 MB if you want the version with a full OpenOffice office suite instead of more lightweight office applications. Puppy Linux is loaded to your computer’s RAM when you boot it up, so it will run entirely from RAM and be as snappy as possible. The computer’s old, slow hard drive won’t be a factor. You can even save your files and customizations to the USB drive containing Puppy Linux — there should be plenty of space considering how small Puppy Linux is.


Puppy Linux has very low minimum system requirements and requires only 128 MB of RAM, although at least 256 MB of RAM is recommended. It offers the most basic applications you’d expect — an extremely lightweight web browser named Dillo, and other programs like an email client, media player, text editor, and image editor. It uses the Openbox window manager by default.

VectorLinux Light

VectorLinux Light is the lightweight edition of Vector Linux. The developers claim it works well on systems with 256 MB of memory — you could even install the Barebone option instead, which will give you a graphical web browser that the developers say performs well on even a Pentium 3 with 128 MB of memory.


VectorLinux Light isn’t optimized for booting from a USB drive and running from RAM in the same way that Puppy Linux is. VectorLinux doesn’t offer a live environment of the latest VectorLinux Light you can take a test drive with at all — it must be installed to your computer’s hard drive before you can use it.

However, if you plan on installing a Linux system to disk, VectorLinux Light is similar to Puppy Linux, with similar system requirements and included applications. You’ll find all the typical programs included — web browser, email client, chat program, text editor, and image editors. It uses the JWM window manager, which previous versions of Puppy Linux used, by default.

Between Puppy Linux and VectorLinux, you should probably go with Puppy Linux — it’s better supported and allows you to run it from a USB drive or just take it for a test run much more easily. VectorLinux’s installation process is less automatic and more dated. On the other hand, choice of Linux distributions often boils down to personal taste, so you may want to try VectorLinux Light if you don’t like Puppy for some reason.

Lubuntu

Lubuntu is based on Ubuntu — it’s an Ubuntu derivative, which means it’s based on the same software as Ubuntu but it includes a different graphical desktop environment and included software. Lubuntu is the most lightweight derivative of Ubuntu, including the lightweight LXDE desktop instead of Ubuntu’s default Unity desktop. Because it’s based on Ubuntu, you can install programs from Ubuntu’s software repositories. The Ubuntu compatibility may also be useful if you ever need to find information about a problem — the web is full of tips for troubleshooting and tweaking Ubuntu, and many of them will also apply to Lubuntu.


This distribution is a bit heavier than Puppy. For example, it includes the full Chromium web browser — based on Google Chrome — instead of more lightweight web browsers like Puppy Linux and VectorLinux Light. Its documentation says it requires at least 256 MB of RAM for daily use, but 512 MB is recommended. It will take up more disk space when installed, too.

Lubuntu is ideal for Ubuntu users who are looking for the most lightweight Ubuntu desktop system possible — or at least the most lightweight Ubuntu desktop system possible without creating your own from scratch. It requires more RAM so it won’t perform quite as well as Puppy Linux or Vector Linux Light on older computers with 256 MB of RAM.

If none of these Linux systems runs well, then your old computer is probably way overdue for an upgrade. These Linux distributions may be tiny and lightweight, but they’re not magical. Even if you’re just using them to browse the web, the modern web is heavier than ever.

If you’re a Linux geek, you have other options for getting a tiny, lightweight operating system. You could install a minimal Debian, Slackware, or even Ubuntu system without a graphical desktop and install the most lightweight graphical desktop possible — or skip the graphical desktop entirely and use terminal programs like the W3M web browser.

Jan 3, 2015

My Five Best Linux LiveCD OS

Linux is so useful, you don't even need to install it before it gets to work. One of the popular uses of Linux is to create live media that can be used to run desktop systems or to create utility discs for all kinds of administration. Confused about the live CD that's right for you? No worries, we've got the top five live Linux CDs to get you started.

The popularity of live CDs has waned a little bit over the years, for a couple of reasons. One of the big reasons a lot of users chose a live CD, initially, was the difficulty of installation. Back in the day, Linux just wasn't as easy to install as it is now. And many users liked to use Linux on a live CD to get the hang of it before trying to dual-boot with Windows or replacing Windows altogether.

By the way, while we're talking about live CDs here, you're not restricted to CDs for most Linux live distros. Some ship full DVDs of software, and most are bootable from USB as well in case you have a netbook or other machine without a optical drive — or just happen to prefer carrying a USB key over a CD or DVD.

Selection criteria: So how were the distros chosen? You'll notice that none of the major Linux distros (a.k.a. Ubuntu, Debian, Fedora, openSUSE, Slackware, etc.) appear in the list, though most of the picks are derived from one of the major distros. Though Ubuntu, Linux Mint, et al. have perfectly serviceable live CDs or DVDs, they're not really designed for long-term use as a live distro. I'm sure some folks do use them that way, but they're the cream of the crop for installing to a hard drive — not for live media.

When choosing the best of the many live media Linux distros out there, I looked for distributions that are actively being developed, that serve a specific and useful purpose, and should be useful to a fairly wide audience. To that end, I picked from end user distros as well as utility distributions that are used for specific tasks.

But I tried to avoid discs that are just interesting to a very, very small audience. You'll find live media distros that are great for niche tasks, but not too interesting to 98% of the Linux community. For example, dyne:bolic looks really interesting for folks who want to do multimedia production. But how many folks want to do serious multimedia production off a live CD? (It also hasn't been updated in a while, so it'd be bumped out anyway...)

Without further delay, let's take a look at the discs that hit the top of charts.

The Undisputed Champion: Knoppix

You simply can't have a list of best Linux live CDs without Knoppix. If not the first live CD to appear, it's certainly the most successful and enjoys a very large and active community.


Knoppix is a Debian-based live CD that uses LXDE (at least in the default) as its desktop and includes most (if not all) of the software you'd want for a desktop system. It's updated regularly, if not speedily, and has excellent hardware support. Knoppix is primarily aimed at being run from live media — but it's proven so popular over the years that support for hard drive installation has been added.

Note that you're not going to see the same set of applications, or quite as up to date, as with Ubuntu, Fedora, openSUSE, etc. Knoppix is optimized for speed and uses some default Debian apps. For instance, you'll get IceWeasel instead of Firefox. But, if you're looking for a live CD with great performance, Knoppix is the one to turn to.

The Knoppix site is just a wee tiny bit cluttered. One might get the impression that the Knoppix folks really, really want you to buy a CD or DVD rather than downloading. You can find downloads via the Torrent tracker (probably the best way to get it if you don't have an ISP that fiddles with Torrent traffic), or grab it from one of the mirrors.

Note that when you download Knoppix, the list of files can be somewhat confusing. Look for the latest version of Knoppix, and pay careful attention to the file names. The current release is 6.2.1, and you want to grab KNOPPIX_V6.2.1CD-2010-01-31-EN.iso for the English language release, or KNOPPIX_V6.2.1CD-2010-01-31-DE.iso for the German release. If you want the DVDs, look under the knoppix-dvd directory on the mirror. This can be confusing because the top of the listing will include Knoppix ADRIANE, which is the Audio Desktop Reference Implementation and Networking Environment. This is primarily for users who are blind or have limited vision.

If you do happen to accidentally download ADRIANE, don't fret — you can use the knoppix "cheat code" to start in the default Knoppix environment. What's a cheat code? One of the many options you can use at the ISOLINUX boot prompt. Here you can specify the language, keyboard set, time zone, and tell Knoppix to skip various hardware detection options if you've had trouble.

Tiny and Feisty: Puppy Linux

For older hardware, or for users who really like minimalist systems, there's Puppy Linux. The ISO image for Puppy Linux is less than 200MB, and can live entirely in RAM — assuming you have a modern system with more than 256MB of RAM, of course. Most systems should be able to easily handle Puppy.


Boot Puppy and you've got a nice little desktop system that has a browser, media player, Word processor, terminal emulator, file manager, drawing apps, the whole shebang. It just doesn't ship with the standard (and some might say, um, full-figured) apps you'll find with today's popular desktop distros. No Firefox, but you've got Midori. No LibreOffice, but you've got AbiWord.

And you can get those other apps. Puppy makes it easy to install packages of the popular (pupular?) and most widely used open source apps. But if you're going Puppy, why not go all the way and live on the slim side?

Ready to embrace the Pup? Head over and grab the latest release. Want it on your hard drive? Read the how not to install Puppy Linux docs.

It's also worth noting there's a variant of Puppy that might be interesting, called Quirky. It's built using Puppy's Woof builder system, and might be interesting for folks who want to experiment.

Backup and Restore Any OS with Clonezilla Live

Computers come and go, but data shouldn't. I love Linux because it's stable and runs on cheap (or expensive, if you prefer) hardware. Linux runs great on older and refurbished hardware, and in my experience is consistently stable and reliable. The same, unfortunately, can't be said for hardware — when you factor in failed RAM, dead hard drives, and so on. It's a good idea to assume that any given system is just one keystroke away from sudden death, and plan accordingly.


For work documents I use Dropbox to keep my writing and notes backed up. That covers my writing, Amazon MP3 downloads, Photos, and other essential data that fits under 50GB. But for the bulk of my data, I use Clonezilla to create a clone of my hard drive every few weeks so if my hard drive dies I can plop in a new drive and restore from backup.

Clonezilla is based on Linux and uses free software — but it doesn't judge. Have some Windows systems or an Intel-based Mac that you want to clone? No worries. Clonezilla will boot on 32- (x86) and 64-bit (amd64) systems, and it handles just about any filesystem you want to throw at it. Even if it doesn't support the filesystem, it can dd the data and restore it byte by byte. If it does support the filesystem type, it can save time by only copying the data used and not the entire filesystem.

You'll find two editions of Clonezilla, one meant to be run from a server and one (Clonezilla Live) to boot from CD or USB. Unless you have a bunch of machines to backup and restore (like a server room full), Clonezilla Live is what you'll want. Just boot the machine using the Live CD or USB, then back up to an external disk or over the network and you're good to go.

Help Me! SystemRescueCD

Along the same lines, I am a fan of SystemRescueCD and try to keep a current release on disc and USB at all times. I rarely need to use it, but when I do, it comes in very handy.


SystemRescueCD is a rescue disc for Linux systems in particular, but also can be used with other x86 or amd64 hardware. (An older version is available for SPARC systems, too.) You can even set it up for PXE booting if you like, so if you're in an environment with a lot of systems, you can dispense with the USB/live CD media and boot systems using PXE. If you need to boot a system and copy data off, or try to rescue the system, or want to nuke the data — SystemRescueCD is for you.

SystemRescueCD has a full complement of rescue tools, networking tools, partitioning tools, and so forth. If it doesn't have everything you need, it comes very, very close. Check out SystemRescueCD today and make sure you have a copy before you need it.

Network Security Toolkit

Last, but certainly not least, there's the Fedora-based Network Security Toolkit (NST). If you've ever looked at the top 100 security tools published by Insecure.org and thought "gee, I wish I had all those in a convenient live media" then you'll love NST.


Granted, it doesn't have all 100, but it comes really close. You'll get Wireshark, Nmap, Snort, Nessus, and even some nifty network geolocation features.

NST sports a Web User Interface that's easy to use, as far as network tools go, and is a must-have for any network or system administrator — or Linux enthusiasts who want to learn more about networking. Like the SystemRescueCD, this isn't one I reach for often, but I like having it around. Note that it's available not only as a live media image, but also as a virtual appliance if you'd prefer to spin it up in VMware Player or Workstation.

Summary

Even if you're not a live CD aficionado, I'd recommend having a live CD on hand anyway. In particular, I'd suggest having the SystemRescueCD or Knoppix tucked away for emergencies. If your hard drive dies or a system update goes awry, being able to boot a system from live media makes a big difference. It's also handy when friends have computer problems, and a good chance to show off Linux to boot.

Mar 9, 2013

Alfa AWUS036NHR / BackTrack5 Installation Guide

Alfa’s AWUS036NHR is Linux compatible. It also works with Backtrack 5, but is not plug and play. Driver installation is needed (note: at this time it does not appear to be possible to get AWUS036NHR into monitor mode AND have 802.11n capabilities at the same time, see Alfa’s AWUS036NH or AWUS036NEH for 802.11n and monitor mode capability in Backtrack 5).


The following is a quick install guide for Linux users. This should allow you to use your AWUS036NHR for Wi-Fi access in most recent Linux distributions running kernel 2.6.38, but as noted, monitor mode does not appear to be supported by this driver. Further down we have a link to a driver that is reported to allow you to use AWUS036NHR in monitor mode, but the corresponding web page notes the device will only have 802.11g functionality.


To install your Realtek RTL8188RU based AWUS036NHR in Linux, first download the driver here (http://www.rokland.com/mask/drivers/awus036nhr-linux.zip). The following steps were taken on a Backtrack 5 computer, but the steps should be similar for other recent distros.

*If you are not able to unzip the file in Linux, you will need to download the file to a Windows computer to unzip and then copy the contents to your Linux computer via flash drive or another method.

1.) When you have the files extracted on your Linux machine, open a terminal window and navigate to the location of the drivers.

2.) Type ./install.sh to install the driver package

3.) If installation completes successfully, then you can connect the Alfa adapter to the computer and open “Wicd Network Manager” from the Internet menu to connect to networks. Inside Wicd, click Preferences and change the network device to the AWUS036NHR adapter. If you are not sure of the device name, in a terminal window type “iwconfig” without quotes and it will list it there. Commonly the device will be called wlan0, wlan1, or wlan2 depending on whether you have other wireless cards installed on the computer.

4.) If you receive a makefile error about “no rule to make target modules”, you may need to prepare kernel headers. As root, at the command line run these commands (you will need to have Internet access on the computer already):
  • prepare-kernel-sources
  • cd /usr/src/linux
  • cp -rf include/generated/* include/linux/
Upon completion, repeat step number 2 above to complete driver installation. Then connect the adapter to the computer and proceed to step 3.

URTWN Driver:

There is a driver called urtwn which specifies compatibility with RTL8188RU chipset-based devices, and allows for them to be put into monitor mode. The documentation for the driver explains that 802.11n functionality is not supported, so RTL8188RU devices will only operate in B/G mode. Rokland has not yet tried to use this driver with AWUS036NHR and is not able to offer installation assistance or support.

You can visit this site for download information and more details: http://resin.csoft.net/cgi-bin/man.cgi?section=4&topic=urtwn

Dec 10, 2014

Ethernet bonding with Linux and 802.3ad

Nowadays, most desktop mainboards provide more than one gigabit ethernet port. Connecting them both to the same switch causes most Linux distros by default to get a individual IP on each device and route traffic only on the primary device (based on device metric) or round-robin. A single connection always starts at one IP and so all traffic goes through one device, limiting maximum bandwidth to 1 GBit.

Here comes bonding (sometimes called (port) trunking or link aggregation) to play. It connects two ore more ethernet ports to one virtual port with only one MAC and so mostly one IP address. Wheres earlier only two hosts (with the same OS running) or two switches (from the same vendor) could be connected, nowadays there's a standard protocol which makes it easy: LACP which is part of IEEE 802.3ad. Linux supports difference bonding mechanisms including 802.3ad. To enable bonding at all there are some kernel settings needed:

Device Drivers  --->
[*] Network device support  --->
<*>   Bonding driver support

After compiling and rebooting, we need a userspace tool for configuring the virtual interface. It's called ifenslave and provided with the Linux kernel. You can either compile it by hand

/usr/src/linux/Documentation/networking
gcc -Wall -O -I/usr/src/linux/include ifenslave.c -o ifenslave
cp ifenslave /sbin/ifenslave

or install it by emerge if you run Gentoo Linux:

emerge -va ifenslave

Now we can configure the bonding device, called bond0. Firstofall we need to set the 802.3ad mode and the MII link monitoring frequency by

echo "802.3ad" > /sys/class/net/bond0/bonding/mode
echo 100 >/sys/class/net/bond0/bonding/miimon

Now we can up the device and add some ethernet ports:

ifconfig bond0 up
ifenslave bond0 eth0
ifenslave bond0 eth1

Now bond0 is ready to be used. Run a dhcp client or set an IP by

ifconfig bond0 192.168.1.2 netmask 255.255.255.0

These steps are needed on each reboot. If you're running gentoo, you can use baselayout for this. Add

config_eth0=( "none" )
config_eth1=( "none" )
preup() {
 # Adjusting the bonding mode / MII monitor
 # Possible modes are : 0, 1, 2, 3, 4, 5, 6,
 #     OR
 #   balance-rr, active-backup, balance-xor, broadcast,
 #   802.3ad, balance-tlb, balance-alb
 # MII monitor time interval typically: 100 milliseconds
 if [[ ${IFACE} == "bond0" ]] ; then
  BOND_MODE="802.3ad"
  BOND_MIIMON="100"
  echo ${BOND_MODE} >/sys/class/net/bond0/bonding/mode
  echo ${BOND_MIIMON}  >/sys/class/net/bond0/bonding/miimon
  einfo "Bonding mode is set to ${BOND_MODE} on ${IFACE}"
  einfo "MII monitor interval is set to ${BOND_MIIMON} ms on ${IFACE}"
 else
  einfo "Doing nothing on ${IFACE}"
 fi
 return 0
}
slaves_bond0="eth0 eth1"
config_bond0=( "dhcp" )

to your /etc/conf.d/net. I found this nice preup part in the Gentoo Wiki Archive.

Now you have to configure the other side of the link. You can either use a Linux box and configure it the same way or a 802.3ad-capable switch. I used an HP Procurve 1800-24G switch. You have to enable LACP on the ports you're connected:


Now everything should work and you can enjoy a 2 GBits (or more) link. Further details can be found in the kernel documentation.

Feb 21, 2014

TP-LINK TL-WR703N - a tiny Linux-capable device for under $23

Update June 2012: As many have noted in the comments, TP-Link sadly decided not to release the TL-WR703N in Europe / America. The TL-WR702N looks identical and is available internationally, but it will not work (it only has 2MB flash)! The closest alternative is the MR3020. This has the same internal hardware as the TL-WR703N, but its case is a little bigger (7.4cm x 6.7cm).

Unless you've been living under the geek equivalent of a rock for the past six months you'll have heard of the Raspberry Pi project. The embedded device they are building will offer incredible power for the $25 it is projected to cost when launched in November 2011. A slightly higher specification 'Model B' (with more memory and a 10/100Mbps Ethernet interface) will cost around $10 more.

The prospect of having a well specified device the size of a credit card, consuming minimal power, that can run Linux is tempting many (including your author).

Patience is a virtue waste of time

But what if you can't wait? There are plenty of options available today that can run Linux:
  • Intel Atom based devices: Intel's low power CPUs dominate the netbook market, but have failed to dent the mobile/embedded space. You can find plenty of Atom-based mini-ITX (17cm square) boards and enclosures out there, and there will be plenty of options to use big disks, add more RAM, and so on. All of this comes at a price - not only financially, but also in power consumption and physical footprint.
  • PC Engines Alix: A little known Swiss manufacturer, PC Engines has been producing high quality x86 boards for many years now. The Alix series utilise the AMD Geode CPUs. These are starting to look a little long in the tooth now, and the price is relatively high (around $100 for the board alone, without enclosure, power supply, etc).
  • Linksys WRT54GL: No list of embedded devices that can be hacked to run Linux would be complete without a reference to the WRT54GL. Sadly this device is looking very dated now - it only has a 200MHz Broadcom CPU and it peaks at around 30Mbps WAN throughput.
  • Modern routers: The Linksys WRT160NL, Buffalo WZR-HP-G300NH, Netgear WNDR3700, TP-LINK TL-WR1043ND (and others) all utilise Atheros chipsets and are supported by OpenWrt (an embedded Linux distribution discussed below). Whilst these are all great devices, they don't have the low cost and small physical size that gives them the 'wow factor' of the Raspberry Pi.
  • Ubiquiti NanoStation: This tiny little device is the only one mentioned that I've not experimented with myself. Whilst its footprint and OpenWrt support are appealing, its 180MHz CPU and relatively high cost ($79) leaves me wanting more.
All of these are either far more than $35 (I'm assuming we all want network connectivity), physically too large, have too little grunt, or a combination of the aforementioned.

So is that it then? Should we pack up our things and just wait until November/December for a tiny, lower power device that can run Linux? Not just yet.

And in the red corner...

TP-LINK is a Chinese consumer networking equipment manufacturer that many of us in Europe and America would not have heard of a year ago. Today they boast of being the largest broadband CPE manufacturer in the world (by market share), but this isn't why we're interested in them.

In early September 2011 TP-LINK launched a new device in China snappily dubbed the TL-WR703N. This device is designed to be a portable 3G WiFi router; plug in a USB 3G dongle and the device will broadcast the Internet connection via Ethernet and WiFi. But again, we're Linux enthusiasts, we're not fussed about what the devices was intended to be used for.

Let's take a look the specifications:
  • Atheros 400MHz MIPS CPU
  • 32MB RAM
  • 4MB flash
  • 10/100Mbps Ethernet interface
  • 802.11b/g/n wireless interface with one internal antenna
  • USB 2.0 port
  • Micro-USB power socket, approximately 1W power draw
  • 5.7cm x 5.7cm x 1.8cm dimensions
There's no video output of any form (nor would you expect there to be on a 3G router!), so this is not going to be playing Quake 3 any time soon. That said, this is perfect hardware for a headless Linux box. And you needn't buy an extra case, wireless card, Ethernet module, power supply, etc - they're all included.

And the cost? It's not available outside of China yet, but you can order it from volumerates.com or some Alibaba sellers for about $23 (US) including delivery. I'm told it will start being sold in the US and Europe over the next few weeks.

Show me some pictures!

And now for a brief visual interlude from all this text:

The box has a very Apple-esque feel and the device is clearly aimed as a competitor for the Airport Express

In the box: Some manuals, a USB to micro-USB cable, a Chinese USB to wall plug adapter, and the device itself

The size of the RJ45 port provides a sense of scale. Also pictured: micro-USB power, reset button and power LED.

The device uses the Atheros AR9331 SoC

OpenWrt: An embedded Linux distribution

OpenWrt, for those that are not aware, bills itself as "a Linux distribution for embedded devices". It's entirely free, entirely open source and actively maintained. It's aimed primarily at users wishing to reflash their wireless routers with something far more powerful than the manufacturer's firmware. Such devices typically have very limited flash storage, RAM and processing power, so OpenWrt needs to be very frugal with its resource usage. Hundreds of common Linux applications are available via their packaging system, and if what you want is not available then the tools are provided for you to build it yourself.

But OpenWrt will not run on every wireless router. A list of supported devices is published here. But when you consider how many router models are out there, the number of supported devices is quite limited.

TP-LINK has a very positive reputation inside the OpenWrt community due to their almost exclusive use of Atheros chipsets (which have strong open source support). So when I first saw this device I knew there was a very strong chance that OpenWrt could run on it. Less than a week after donating my TL-WR703N to the project, the OpenWrt developers had incorporated full support for it. Success!

Installing OpenWrt on the TL-WR703N

Installing OpenWrt on the TL-WR703N is very straightforward. To summarise the steps involved:
  1. Connect a network cable between your PC and the TL-WR703N, and set a static IP on your PC of 192.168.1.2 (subnet mask: 255.255.255.0)
  2. Head to the TP-Link admin interface on http://192.168.1.1. Login with user "admin" and password "admin"
  3. Find the Router Upgrade link on the left-hand menu (or go directly to http://192.168.1.1/userRpm/SoftwareUpgradeRpm.htm)
  4. Upload the latest OpenWrt snapshot for the TL-WR703N
  5. Wait 4-5 minutes for the firmware to upload and the device to reboot. The blue LED will be lit solid when it's finished.
  6. You should be able to telnet to the device on 192.168.1.1 and receive an OpenWrt prompt (no password required)
If you want a web interface on the device then you should:
  • Set a password on the device (use the "passwd" command). Note: once you've done this you will need to SSH to the device, telnet will be disabled.
  • Configure /etc/config/network with an IP address, gateway and DNS servers that allow the device to access the Internet. Either reboot the device or run "/etc/init.d/network restart" to apply the settings.
  • Run "opkg update" and "opkg install luci" to install the web interface.
Living with the TL-WR703N

So what can you do with this tiny $23 Linux device? If you've read this far then you've probably got some ideas already (I'd love to hear them), but here's a few thoughts:
  • The USB port needn't be used for a 3G dongle (the original intended purpose). For example: Plug in a USB hard disk, install Samba, and you've got yourself a tiny little NAS.
  • It's easy to forget the device has a WiFi interface. You could run a tiny wireless access point / bridge, or a wireless network scanner, or IDS, or ...
  • The fact that it can be powered by micro-USB means you can power it from nearly anything that has a USB (host) port. Your existing router perhaps? Your monitor? An in-car USB power adaptor?
  • Mobile phone battery packs (which typically have micro-USB connectors, now that they are the standard) could be used to power the device for portable use.
  • The CPU and Ethernet interface are surprisingly powerful - if you configure it properly you can easily saturate the 100Mbps interface (I've tested this with iperf both in TCP and UDP modes).
Just as importantly, here are some key limitations (these apply to many OpenWrt-based devices of course):
  • You're not going to have much luck running large application suites on this device. For example, a full Apache / PHP / MySQL stack is not going to be viable (due to RAM and storage limitations).
  • The wireless antenna is a strip mounted on the PCB, so don't expect wonderful coverage.
  • Don't keep writing to the root file system (a flash overlay): repeated writes will wear out the flash chip. Use /tmp if you can live with temporary storage, or attach additional storage via USB. This applies to most OpenWrt supported devices.
Conclusion

The TL-WR703N running OpenWrt is a formidable embedded device. It has a solid feature set, a tiny form factor and a low price tag. What's not to like?

I've written this post in the hope of sharing my enthusiasm for this device. Almost everyone I've shown the device to has been staggered by its form factor and every person has a different idea for how to use it. I think it has the potential to become an extremely popular device and I'm really looking forward to seeing what people do with them.

Further reading
  • The TL-WR703N wiki page on OpenWrt.org. If you have additional insights/comments that might be useful to others, then please register and contribute to the wiki!
  • The OpenWrt forums are a good place to start for questions or issues. Be sure to search the forums and wiki before posting.
  • If you're a Chinese user, right.com.cn has a dedicated OpenWrt section and has a lot of recent threads on the TL-WR703N.
  • Further photos at a higher resolution are available in my Picasa album.

Sep 21, 2013

Valve Hints at Steam Box

Valve is teasing new hardware-related announcements coming next week. As reported by Ars Technica, Valve co-founder Gabe Newell spoke at LinuxCon in New Orleans today, saying, “It feels a little bit funny coming here and telling you guys that Linux and open source are the future of gaming. It's sort of like going to Rome and teaching Catholicism to the pope."


He continued by teasing, “Next week we're going to be rolling out more information about how we get there and what are the hardware opportunities we see for bringing Linux into the living room.”

This is hardly a surprise from Newell, who has championed Linux in the past by bringing Steam to Linux and repeatedly touting the strength of an open source future.

Earlier this year, Newell discussed how Linux can reinvent gaming, noting that Linux helps Valve “make sure we have the freedom to innovate and pursue the opportunities all of us see,” and saying that “Linux is kind of a get out of jail free pass for our industry if we need it.” He added that “our company wouldn’t exist if it wasn’t for the openness of PC. Steam wouldn’t exist if it weren’t for the openness of the internet. Our industry will be best in the long run if there’s an open platform for innovation and competition.”

Valve first confirmed hardware development last year and later put up a post seeking beta testers with a hardware beta due soon afterwards. In March, Newell said Valve was readying a prototype, but little is known about Valve’s actual hardware.

We’ve reached out to Valve for more information about its Steam Box plans and will update this story with any comment we receive.

Jan 16, 2015

LACP/Etherchannel Algorithms & Linux Bonding Modes

The LACP Mode in Enterasys or the Port-channel mode in Cisco, have their own algorithms for the priority selection for the slave interfaces involved in the bonding.
As I am a Linux Guy I am more familiar with the Bonding in Linux envoirnment.
We can create bonding in the /etc/sysconfig/network/ifcfg-bond0,here we can define the Master Interface with the IP address and then the slave interfaces involved in the bonding process along with the Mode of the Bonding.

The Switch connected for the bonding also has it's own aggregation algorithm present which must match the with the mode set in the server.

There are 7 modes present in the Linux kernel.

Refer to the Bonding Documentation in the Linux Kernel, it will be available at the path
cat /usr/src/linux-2.6.38/Documentation/networking/bonding.txt | less

More verbose information can be found at
http://www.linuxfoundation.org/collaborate/workgroups/networking/bonding

Enterasys :
In Enterasys Switches such as N-series, the LACP Lag output Algorithm can be set for the 3 modes
DIP-SIP - Destination IP address/Source IP Address, slave interfaces are assigned on the basis of Source or Destination IP Addresses.
DA-SA - Destination MAC Addess/Source Mac Address, slave interfaces are assigned on the basis of Source or Destination MAC Addresses.
Round-Robin - Equal distribtution from the first slave to all slaves in round-robin fashion

To check for the LACP algorithm use following on the Enterasys Switch
Matrix N3 Platinum(su)->sh lacp ?
Specifies the lag port(s) to display
outportAlgorithm Shows lacp current ouport algorithm
flowRegeneration Shows lacp flow regeneration state
singleportlag Show single port lag setting
state Show global lag enable state
Matrix N3 Platinum(su)->sh lacp outportAlgorithm
dip-sip
Matrix N3 Platinum(su)->

To set the LACP outputalgorithm to different mode
Matrix N3 Platinum(su)->set lacp outportAlgorithm ?
dip-sip Use sip-dip algorithm for outport determination
da-sa Use da-sa algorithm for outport determination
round-robin Use round-robin algorithm for outport determination
Matrix N3 Platinum(su)->set lacp outportAlgorithm round-robin
Matrix N3 Platinum(su)->

Hence in accordance with the Mode set on the switch we can set the mode in the Linux
After doing this the LAG groups present will use the round-robin algorithm for flow distrbution.
Remember this is the global configuration which will cause change in algorithm of all LAG ports present.
By default the dip-sip algorithm is configured in the Enterasys switches.

Cisco :
On the Cisco Catalyst Switches, the port-channel can be used in LACP mode for the operation.
The default Load-balancing method used is src-mac (Source MAC Address).
Cisco allows us to perform the dry-run of the algoritm implemented using the test command.
I have all interfaces configured in the LACP Mode (Not in PAgP).

To check what is the current algorithm
Cisco#sh etherchannel load-balance
EtherChannel Load-Balancing Configuration:
src-mac
EtherChannel Load-Balancing Addresses Used Per-Protocol:
Non-IP: Source MAC address
IPv4: Source MAC address
IPv6: Source MAC address
Cisco#

To test the Etherchannel Algorithm used
Cisco#test etherchannel load-balance interface port-channel 1 mac 00:18:17:F1:F9:C4 E4:9F:16:C5:11:56
Would select Gi1/0/1 of Po1
Cisco#

In IP based we can use the IP address to test the etherchannel.
To see the Ether-channel algorithm present
Cisco(config)#port-channel load-balance ?
dst-ip Dst IP Addr
dst-mac Dst Mac Addr
src-dst-ip Src XOR Dst IP Addr
src-dst-mac Src XOR Dst Mac Addr
src-ip Src IP Addr
src-mac Src Mac Addr
Cisco(config)#port-channel load-balance

Here we can see that there is the src-dst-ip & src-dst-mac which are used for inducing additional randomization using the XOR logical operation present.

Hence the load-balancing can be done using the Destination IP address or Source IP address, same goes for the MAC addresses.

To set the New Algorithm
Cisco(config)#port-channel load-balance dst-mac
Cisco(config)#

Now the Load-balancing will happen through the Destination-Mac Address.I will do some more research on this and update the post.

Jan 9, 2015

How to create and extract zip, tar, tar.gz and tar.bz2 files in Linux

Data compression has been extremely useful to us over the years. Whether its a zip file containing images to be sent in a mail or a compressed data backup stored on a server, we use data compression to save valuable hard drive space or to make the downloading of files easier. There are compression formats out there which allow us to sometimes compress our data by 60% or more. I’ll run you through using some of these formats to compress and decompress files and directories on a Linux machine. We’ll cover the basic usage of zip, tar, tar.gz and the tar.bz2 formats. These are some of the most popular formats for compression used on Linux machines.

Before we delve into the usage of the formats I’d like to share some of my experience using the various formats of archiving. I’m talking about only a few data compression formats here, and there are many more out there. I’ve realized that I need two or three formats of compression that I’m comfortable using, and stick to them. The zip format is definitely one of them. This is because zip has become the de-facto standard choice for data compression, and it works on Windows as well. I use the zip format for files that I might need to share with Windows users. I like to use the tar.gz format for files that I would only use on my Mac and Linux machines.
ZIP

Zip is probably the most commonly used archiving format out there today. Its biggest advantage is the fact that it is available on all operating system platforms such as Linux, Windows, and Mac OS, and generally supported out of the box. The downside of the zip format is that it does not offer the best level of compression. Tar.gz and tar.bz2 are far superior in that respect. Let’s move on to usage now.

To compress a directory with zip do the following:

# zip -r archive_name.zip directory_to_compress

Here’s how you extract a zip archive:

# unzip archive_name.zip

TAR

Tar is a very commonly used archiving format on Linux systems. The advantage with tar is that it consumes very little time and CPU to compress files, but the compression isn’t very much either. Tar is probably the Linux/UNIX version of zip – quick and dirty. Here’s how you compress a directory:

# tar -cvf archive_name.tar directory_to_compress

And to extract the archive:

# tar -xvf archive_name.tar.gz

This will extract the files in the archive_name.tar archive in the current directory. Like with the tar format you can optionally extract the files to a different directory:

# tar -xvf archive_name.tar -C /tmp/extract_here/

TAR.GZ

This format is my weapon of choice for most compression. It gives very good compression while not utilizing too much of the CPU while it is compressing the data. To compress a directory use the following syntax:

# tar -zcvf archive_name.tar.gz directory_to_compress

To decompress an archive use the following syntax:

# tar -zxvf archive_name.tar.gz

This will extract the files in the archive_name.tar.gz archive in the current directory. Like with the tar format you can optionally extract the files to a different directory:

# tar -zxvf archive_name.tar.gz -C /tmp/extract_here/

TAR.BZ2

This format has the best level of compression among all of the formats I’ve mentioned here. But this comes at a cost – in time and in CPU. Here’s how you compress a directory using tar.bz2:

# tar -jcvf archive_name.tar.bz2 directory_to_compress

This will extract the files in the archive_name.tar.bz2 archive in the current directory. To extract the files to a different directory use:

# tar -jxvf archive_name.tar.bz2 -C /tmp/extract_here/

Data compression is very handy particularly for backups. So if you have a shell script that takes a backup of your files on a regular basis you should think about using one of the compression formats you learned about here to shrink your backup size.

Over time you will realize that there is a trade-off between the level of compression and the the time and CPU taken to compress. You will learn to judge where you need a quick but less effective compression, and when you need the compression to be of a high level and you can afford to wait a little while longer.

Jan 3, 2015

How-To Make Live USB Bootable Ubuntu 9.04

Ubuntu 9.04 is the latest in line of Ubuntu Linux operating system, which is faster and has a more improved user experience. I have only 3 partitions on my hard disk, one for Windows Vista, one for Windows 7 beta, and one for my local files. I am used to 3 partitions maximum, since it looks less cluttered this way. Instead of creating a fourth partition, why not try installing it on a USB drive? Obviously, doing a proper install is better than doing a installation on USB, but since I don’t use Ubuntu much creating a fourth partition doesn’t make sense either.
For those having problems with bootable live CD, they can try creating a bootable live USB.
UNetbootin is a free portable tool for both Windows and Linux that lets you create bootable live USB drives for a variety of Linux distributions. It also lets you do a quick ‘frugal install’, but we will only cover the procedures for creating a bootable live Ubuntu USB in this post.

Once you run this tool, you get two choices. Either you can select to download a Linux distribution from the list or you can locate the disk image of the Linux distribution you downloaded. If you have not downloaded Ubuntu yet, select Ubuntu from the list of Linux distributions and then select the latest version 9.04_live from the list.


In my case, I already downloaded Ubuntu 9.04 Desktop Edition Image file(.iso file) from the website, so the later option would be best for me.

Note: You should have a USB Drive with a minimum 1GB of free memory.

Once the installation is complete, it will ask you to restart the computer. Click Reboot Now to restart your system.


Now while your system is starting up press the appropriate button(usually F1, F2, F12, ESC, Backspace, or Escape) to bring up Bios Boot Menu. Now change the startup order to boot USB by default, usually you will have to press F6 to move the selected USB device on top. Once done, save changes and restart the system. Now you will have Ubuntu running from USB drive.

Note: If you get ‘BOOTMGR is missing’ error, then this article will help you fix it.

Enjoy!

May 24, 2013

5 Ways to Crack or Reset a Forgotten Windows XP Administrator Password

I recently helped a client recover his forgotten Windows Administrator password by using a couple of different tools. We eventually were able to reset the Administrator password to a blank password so that he could log into Windows. Unfortunately, there is no “one” way to reset a Windows password and depending on what version of Windows you are running, you might have to try different things.


There are already so many articles written on how to recover or reset a password that I’m not going to reinvent the wheel, but instead will guide you to the best online resources that I used to crack my Windows XP password.

1. Ophcrack Live CD – My favorite ways to blank out or crack a Windows password is to use a Linux Live CD. These are special distributions of Linux that run directly from the CD (no installation required) and are specially designed for cracking Windows passwords. You can read the documentation to learn how to use it. Simply burn the ISO and boot using the CD and the program will get right to work. It won’t work, however, on very complicated password because it actually tries to determine the password rather than reset it.

2. Offline NT Password and Registry Editor – This is a very small program, only 3MB in size, that you can burn to a CD and boot to. It’ll auto-detect the Windows installation and the account names (that is if everything was installed in the default Windows directories). Using this program you can reset or blank out a Windows password, which means it doesn’t matter how long or complicated it is. I tried this program on Vista and it would not load afterwards, so definitely only use for Windows XP or earlier!

3. Login Recovery – Login Recovery is a web site that has a program that you can either download onto a floppy disk or a cd and that you use to boot up with. You’ll get a list of account and some numbers when the program runs. Take those numbers and enter them onto the web site and Login Recovery will crunch it through it’s system to find out password for Windows NT, 2000, XP and Vista. I have tried this site and it did not work for my password, which was 11 characters and mostly symbols, numbers, and letters. However, if the password was something simple, they will probably be able to crack it.

4. John The Ripper – Another free password cracker that works on Windows, Linux and Macs, so it’s useful for any Mac or Linux user who wants to recovery a password. Pretty easy to use and comes with good instructions, so most people can follow along.

5. Knoppix STD – G4TV has a good article on another Linux distro you can download and use to crack your Windows password. Follow the detailed instructions he gives and if the password is not too long or difficult, it should be able to crack it!

As you can tell, the best ways to crack a Windows password is using Linux! It might be a little too techie for some people, but it’s definitely worth it if you want to avoid having to re-install Windows and lose all of your data! Any questions, post a comment!

Jan 18, 2015

"Rocha" : Pear OS 8 Review

I have been following Pear Linux/OS for quite sometime. In fact, in between, I used Pear OS 6, the LTS one, as my main production distro for quite sometime last year. Pear OS intrigues me primarily because of it's striking resemblance to Mac OS X and inherent simplicity of the controls. Pear OS 8, based on Ubuntu 13.04 or Ubuntu Raring Ringtail, is the latest release from their stable. Unfortunately this release comes a bit late with the Ubuntu Raring already 6+ months old and Ubuntu Saucy (the latest version) already released. So, my basic interest was how the latest release of Pear OS fare against the previous LTS release: Pear OS 6 with support till April 2017.


Pear OS 8 release states the following incremental improvements:
  • New refreshing design with an intuitive and powerful desktop environment
  • No unnecessary programs or trial software to slow things down
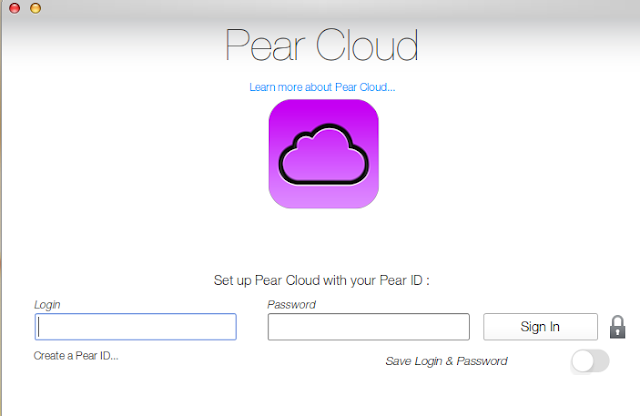
  • Pear Cloud to share files across platforms
  • Utility software like MyPear 6, Clean My Pear 2, etc. to provide easy customization options for users
I downloaded the 1 GB 32-bit ISO for this test, created a live USB using Unetbootin. I used a couple of laptops for this test:
  • Asus K54C with 2.2 Ghz Core i3 processor, 2 GB DDR3 RAM & Intel HD 3000 128 MB graphic memory
  • Asus K55VM with 2.8 Ghz Core i7 processor, 8 GB DDR3 RAM & Nvidia GEFORCE 2 GB graphic card
I did a live boot on both the laptops and then installed Pear OS 8. The primary reason for installing in a couple of laptops is that throughout 2012-13, I used Asus K54C for testing the Linux distros and record benchmark performance. However, now with a lot of improvement going on as far as drivers for dedicated graphic cards are concerned, I intend to use Asus K55VM for all purposes in 2014. Hence, in the transition phase I am using both the laptops.

Pear OS 8 ships with tweaked GNOME 3.6.3 and Linux kernel 3.8.0. Nautilus 3.4.2. I expected Pear to migrate to the more modern Nautilus fork Files; anyway, both are one of the best file managers in business.

Aesthetics

I must say that I am very impressed with Pear OS 8 interface. It is very simple, intuitive and functional. Unlike Pear Linux 6 & 7, the annoying animations are left out to go for a more sober and subtle effects. The default wallpaper is quite good and gels with the overall Mac-ish theme. The desktop interface looks very refined and aesthetically appealing to the eyes.


Pear OS also ships with some attractive Pear OS branded wallpapers. A couple of them are quite original and better than the default wallpaper.


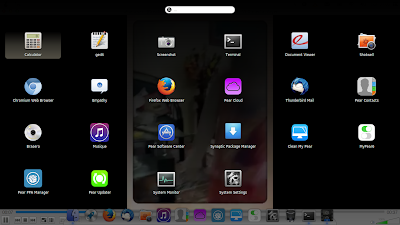
The dash is similar to GNOME and is activated on clicking the launcher. Regular Linux user will take a day or two to adjust to the Pear OS interface as the launcher is in the docky, rather than at the top panel. Unlike Unity dash, Pear dash doesn't have any filters and it may become a bit cumbersome when you install a whole lot of applications. Never-the-less, like GNOME dash, a search option is there to locate the preferred applications.


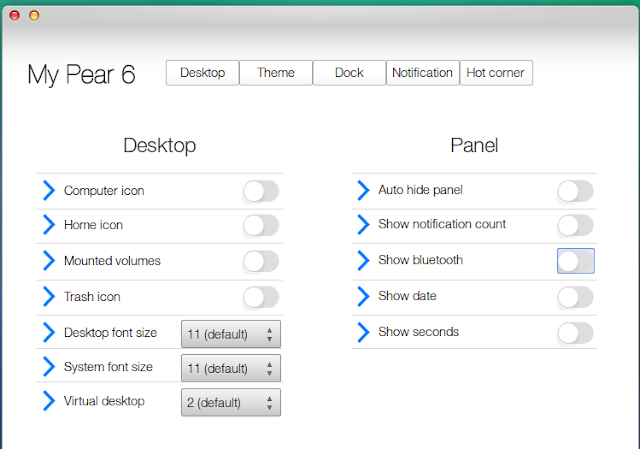
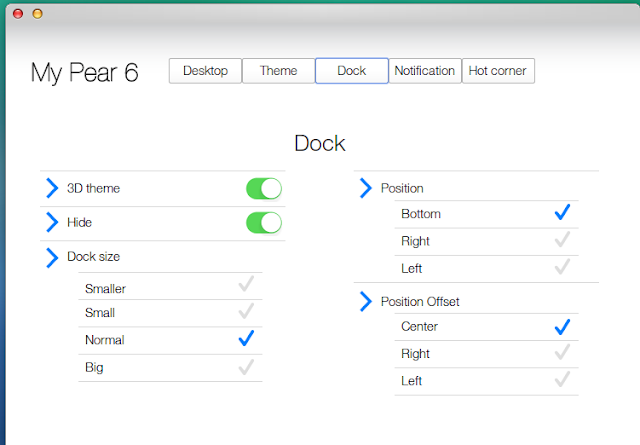
Pear OS comes with a whole lot of flexibility to change the look and feel, via My Pear 6. It has several options to tweak the desktop and dock appearances.


However, the theme option is still empty and hopefully by the time the Pear 9/10 is out, we'll get to see some aesthetically pleasing themes.

Further, somehow the hot corners didn't work for me in Pear OS 8. They worked for me in the previous two releases of Pear on the same laptop.

In overall, if you are looking for a Mac OS X look alike Linux, Pear OS is a tough competitor to Elementary OS. Simply put, the interface is very sophisticated and looks gorgeous enough to draw attention of on-lookers.

Applications

Pear OS basically provides very few applications pre-installed. It has been the case with all the releases that I have used. Anyway, it is kind of better for the users with stable internet connection to install their preferred packages instead of the OS developer choosing what they should be using. Below is a list of the limited applications that Pear OS provides:
  • Office: Document viewer, Pear Contacts
  • Internet: Firefox 25, Empathy IM, Thunderbird, Pear Cloud
  • Graphics: Shotwell Photo Manager
  • Multimedia: Brasero, Musique 1.2.1, Screenshot
  • Accessories: Calculator, gedit, terminal, Clean my Pear, MyPear6, Pear PPA Manager
There is no proper word or spreadsheet processing application and required to be installed from the Ubuntu repositories. I installed LibreOffice 4 and it worked well with Pear.

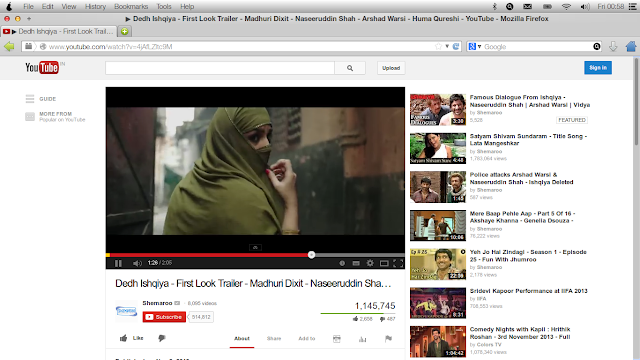
Internet section is the richest in Pear OS and comes with Firefox as the default browser. Multimedia codecs and Adobe flashplugin gets installed during the OS installation. I could watch my favorite YouTube movies without any issue post installation.


As regarding to the other applications, I discuss them in the following sections on the merits and demerits of Pear OS 8.

Settings are integrated and similar to GNOME or Unity settings. Pear OS also comes pre-installed with a few Pear OS specific settings options like My Pear 6, Clean My Pear, etc.


Installation

Installation is simple and similar to Ubuntu Raring. No surprises there and it is a step-by-step process which starts with selection of language, followed by keyboard type and language, location and time zone, hard drive where to install Pear and finally user ID creation.


Repositories

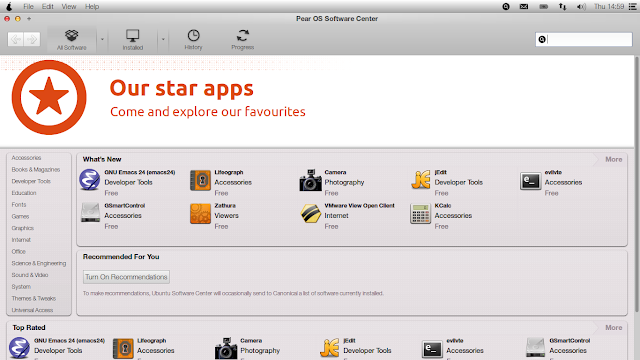
Pear OS 8 sources it's applications from Ubuntu Raring and other third party repositories. As mentioned earlier, Pear Software Center and Synaptic Package Manager are the default interfaces to download packages.


Performance

I must say Pear OS 8 is very smooth to use. Doing away with the fancy effects have actually resulted in an improvement in performance and smoothness of use. At steady state, the 32-bit OS consumes about 1-10% CPU and 190 MB RAM with task manager running on Asus K54C. Under similar circumstances on the same laptop, Pear OS performed way better than other GNOME 3 distros that I have used in 2012-13.

Operating System Size of ISO Base Desktop Linux kernel CPU Usage RAM usage Size of installation
Pear OS 8 1 GB Ubuntu Gnome 3.6.3 3.8.0 1-10% 190 MB 3.67 GB
Zorin OS 7 1.5 GB Ubuntu Gnome 3.6 3.8.0 1-10% 195 MB 8.60 GB
Antergos 2013.08.20 671 MB Arch GNOME 3.8.4 3.10.0 1-10% 207 MB 3.6 GB
Ubuntu 12.04.2 LTS 693 MB Ubuntu Unity 5 3.5.0 1-10% 230 MB
Pear OS 6 862 MB Ubuntu Pear Aurora 1.0.5 3.2.0 1-5% 235 MB
ROSA 2012 Fresh Gnome 1.1 GB Mandriva Gnome 3.6.2 3.6.10 1-10% 235 MB
Linux Deepin 12.12.1 1.2 GB Ubuntu GNOME 3.8 3.8.0 1-10% 240 MB 4.0 GB
Ubuntu 12.04.3 LTS 741 MB Ubuntu Unity 5.20.0 3.8.0 1-10% 250 MB 3.06 GB
Ubuntu GNOME 13.10 919 MB Ubuntu GNOME 3.8.4 3.11.0 1-10% 256 MB 3.37 GB
Elementary OS Beta 1 651 MB Ubuntu Pantheon 3.2.0 1-5% 270 MB 2.87 GB
LuninuX 12.10 1500 MB Ubuntu Gnome 3.6 3.5.0 1-5% 280 MB
Ubuntu 12.04.1 LTS 730 MB Ubuntu Unity 5 3.2.0 1-10% 280 MB
Ubuntu 13.04 Gnome 1 GB Ubuntu Gnome 3.8 3.8.0 1-10% 280 MB
Zorin 6.4 Educational 2 GB Ubuntu GNOME 3.4.2 3.2.0 1-10% 285 MB 5.6 GB
Fedora 17 Gnome 677 MB Fedora Gnome 3.4.1 3.3.4 1-10% 296 MB
Fedora 19 GNOME 964 MB Fedora GNOME 3.8 3.9.8 1-10% 297 MB 3.28 GB
Zorin 6 Core 1.4 GB Ubuntu Gnome 3.4.1 3.2.0 1-10% 300 MB
Fedora 18 Gnome 932 MB Fedora Gnome 3.6.2 3.7.2 1-10% 310 MB
OpenSUSE 12.2 Gnome 704 MB OpenSUSE Gnome 3.4.2 3.4.6 1-10% 310 MB
Pear OS 7 (64 bit) 1.1 GB Ubuntu Gnome 3.6 3.8.5 1-5% 315 MB
Ubuntu 13.04 835 MB Ubuntu Unity 7 3.8.0 1-10% 320 MB 4.98 GB
Pinguy OS 12.04 1.8 GB Ubuntu Gnome 3.4.1 3.2.0 1-5% 325 MB
Hanthana Linux 19 4.4 GB Fedora GNOME 3.8.4 3.11.2 1-10% 335 MB 11.74 GB
Ubuntu 13.10 939 MB Ubuntu Unity 7.1.2 3.11.0 1-10% 360 MB 3.70 GB
Sabayon 13.08 GNOME 1.8 GB Gentoo GNOME 3.8.3 3.10.0 1-10% 363 MB 6.13 GB
Ubuntu 12.10 790 MB Ubuntu Unity 6 3.5.0 1-10% 412 MB

My Experience with Pear OS 8

Following are the good and not-so-good experiences that I had while using Pear OS for a week or so on both the laptops:

Best of Pear OS 8

Here I am highlighting the features of Pear OS 8 that I really liked during my usage:

My Pear 6: As I highlighted in the section on Aesthetics, it is a handy little application to tweak Pear OS appearance. Good job by the developers!

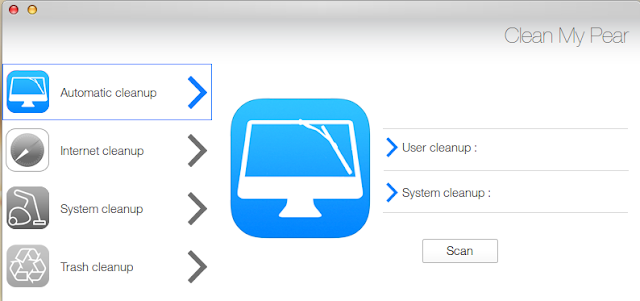
Clean My Pear: I like this application for the ability to clear cache and free up a lot of space. It acts like Janitor and provides flexibility of system wide clean up, only internet cache clean up and trash clean up, etc. It is a handy option for users unfamiliar with a great deal of technicalities.


Automatic Updater: The update manager is added to the start up and provides options to view the packages to be updated, update via synaptic, install update and finally, if you are in the middle of something and not really interested to update, quit update. It is simple and intuitive.


Pear Cloud: It is a virtual storage space similar to Ubuntu One and gives 2 GB space for free. It requires creation of login profile and is good to access files from any computer. However, if you already have a dropbox account, you may not be interested in Pear Cloud.


Pear OS Software Center: It is good to see Pear OS acknowledging it's roots and retaining the Ubuntu Software Center. The previous app center was too much Mac-ish for me and the present one is a more familiar interface.


Synaptic Package Manager: Another utility application and works faster than Ubuntu Software Center. It is the best package manager I have used. But, it may be a daunting initially for Linux novices to use Synaptic.


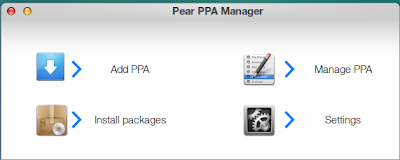
Pear OS PPA Manager: Adding and managing PPA's in Pear OS is very easy using the PPA manager. I really like the intuitive interface and simplicity that it provides. Pretty handy for new Linux users.


Installing Nvidia drivers in Pear OS 8

It is similar to Ubuntu Raring and involves the following steps:
Add Bumblebee ppa and install bumblebee with nvidia drivers from the terminal

sudo add-apt-repository ppa:bumblebee/stable
sudo apt-get update
sudo apt-get install bumblebee bumblebee-nvidia primus linux-headers-generic


Reboot and run optirun ls -l from the terminal to check if it looks like the screenshot below. If you get the output as shown here then bumblebee is working and the laptop heat will come down drastically.


You can now selectively choose the programs for which you need to run nvidia.

Bugs that I noted

Pear OS 8 comes with a few bugs that I noted while using it.

Issue with Root log in: On my first attempt I was unable to login as root and it won't accept any password. So, I went back to my user ID login and created a password for root login by running the following command at the terminal:

sudo passwd root

This would prompt to enter and re-enter the root password that I would like create. And it worked!

Curious case of VLC player: In root login, I could see a VLC player but was not visible in the dash. I re-installed it again from my user ID login. Still, VLC won't show up. So, I started VLC from the terminal and pinned it on the docky. Thereby, I could actually run VLC player and play my desired media files.


Issue in accessing USB drives: Somehow, I was not able to transfer files to any USB drivers. They were all in FAT-32 format (works with all operating systems including Windows and Linux). I tried changing permissions from root login, ran chmod command as root, etc. etc. But, nothing worked. Even the shared folders in LAN were not accessible. Possibly a bug and normally it doesn't happen with me with any Fedora/Ubuntu/Debian spin.

Pretty slow Musique: Musique 1.2.1 is the default music file player and it took ages to load my collection of about 2 GB music files. Other players that I have used are 100 times more faster than musique. However, on clicking a single file, it played quite well. Further, using the preset options in equalizer, I could modify the effects that I wanted. It is a versatile player no doubt but I need faster import of media files.


Irritating language download options in live boot: Every time I did a live boot of Pear OS 8, an irritating language pack download option would automatically start. I don't expect any download to start in live boot and manually I had to kill it. Possibly it can be done away with in live boot and kept for post installation to do things.


No hot-corners for me: As I mentioned earlier, the hot-corners for easy access of dash or open applications didn't work for me.


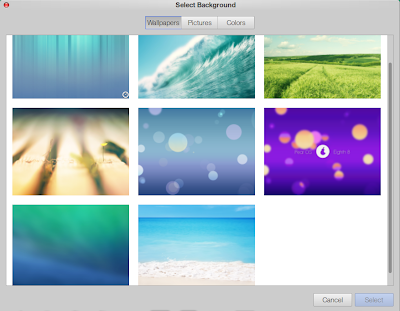
No option to select user wallpapers: With Pear OS 8, I was stuck with the system wallpapers only as there was no option to include any folder in the Select Background entry. It is a bug for sure and I hope the developers correct it as soon as possible as it seriously limit customization options for the users.


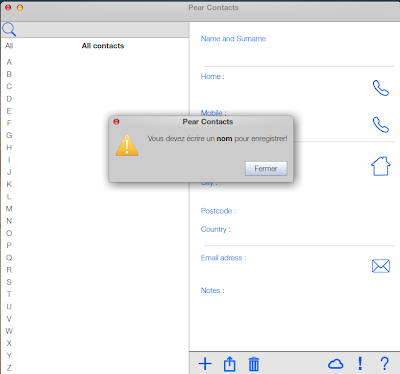
French language in some applications: Some apps like Pear contacts still bear the French language.


Overall

Pear OS 8 presents an unique combination of aesthetics and functionality. The present version is the best Pear OS I have used, if I discount the bugs that I discussed above. However, the users on Pear OS 6 may have little incentive to upgrade to Pear OS 8 as this edition has barely 3-4 months of support. So, they may be better off waiting for the Pear OS based on Ubuntu 14.04 LTS to release. Looking at the present improvements and refinement that I noted in this version, I can expect a great LTS release from Pear in the pipeline.

One thing here, I didn't experience similar bugs in Pear OS 6, except for the launcher breaking down occasionally. Was this release a bit rushed? Not sure. Anyway, the users who are interested to try out Pear OS 8, please go ahead and experience Pear. It may not be exactly Mac but the closest Linux can offer to Mac OS X. Pear OS 8 is available in both 32 and 64 bit versions and they can be downloaded from here.